
How To Make Peanut Butter Cups

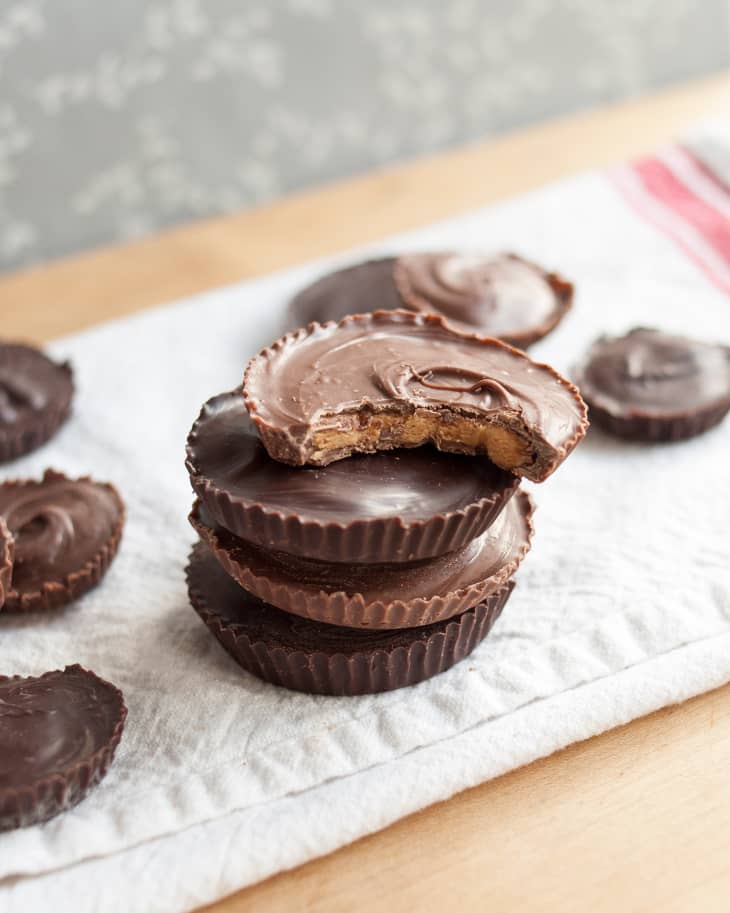
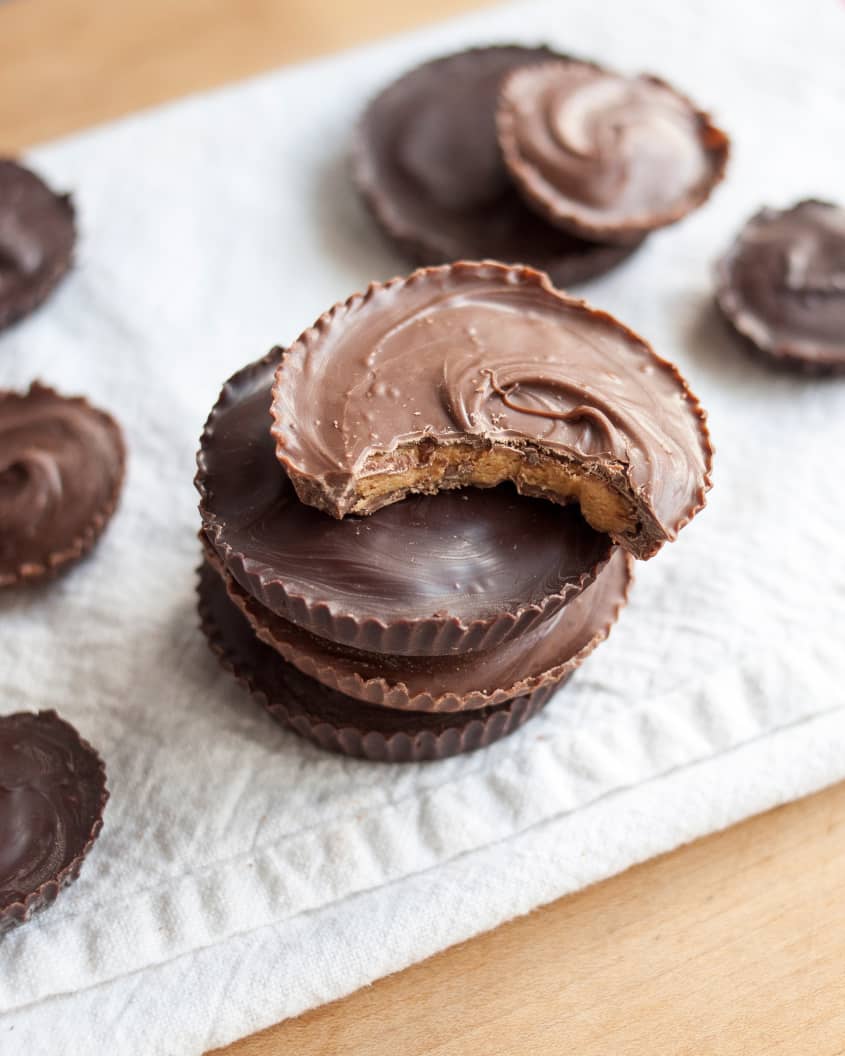
This is how you win friends: make them homemade peanut butter cups. Peanut butter plus chocolate is always a winning combo, of course, but peanut butter cups are really the ne plus ultra of what the duo can accomplish. Made from scratch, they seem almost magical — how did that creamy peanut butter filling get in there? But it’s not magic! In fact, it’s quite simple.
While these peanut butter cups are certainly “easy” in that they only require three ingredients and a simple process of sandwiching peanut butter with chocolate, I also won’t to lie to you: they are pretty labor intensive. It helps to have a friend to keep the assembly line going — one of you to drop dollops of chocolate into the cups, the other to spread it into a thin layer; one of you to make sure the chocolate stays appropriately melty and liquidy, the other to add a swirl to the top of each cup. If you don’t have a buddy to help you, set aside a few hours on a weekend afternoon and put on some good music.
Let’s also talk about tempering. Don’t let this scare you away from making these peanut butter cups. First of all, if you don’t temper your chocolate, your peanut butter cups will be just as delicious — tempering just adds that extra touch of awesome by giving the cups a glossy look and snappy bite. Secondly, there’s a very easy, very non-scary method for tempering chocolate that doesn’t involve thermometers or careful temperature control. I describe it here, and you can read more about it in this post on How to Temper Chocolate Without a Thermometer.
You can also learn from my mistakes. While making several batches of these cups, I was constantly frustrated by losing the temper on my chocolate by the time I got to the final step of topping the filled cups. I finally (and somewhat belatedly, as you can see by the occasional swirl of bloom on the chocolates in these photos) realized that it’s much easier to melt the chocolate in two batches: first to line the bottom of the cups and then to fill the tops. In fact, only the second batch really needs to be tempered. This might sound like it creates more work, but trust me, you’ll be much happier overall.
Yes, these cups are something of a labor of love, but it’s also so incredibly satisfying to gaze upon your homemade candy bounty. I mean, you made candy! How awesome is that? The answer: very.

How To Make Peanut Butter Cups
Makes 24 large candies
Nutritional Info
Ingredients
- 1/2 cup
peanut butter or other nut butter
- 6 tablespoons
powdered sugar
Optional filling flavorings: 1/2 teaspoon pumpkin spice mix, cinnamon, or other spice
- 1 pound
good-quality dark chocolate or milk chocolate, chopped if purchased as a block
Equipment
Measuring cups and spoons
Food processor or blender
Stiff spatula
Baking sheet
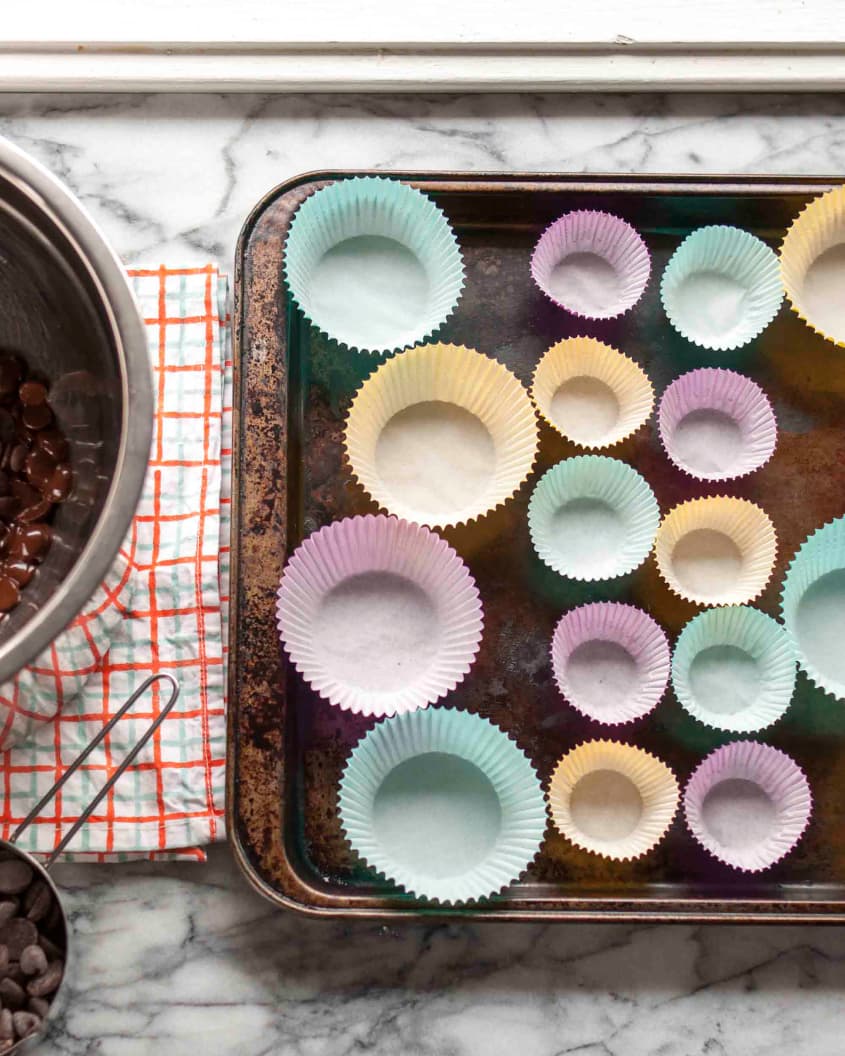
Muffin cup liners, large or small (or mixed!)
Heatproof bowl (large enough to sit over your saucepan)
Saucepan (or double boiler)
Spoon
Instructions
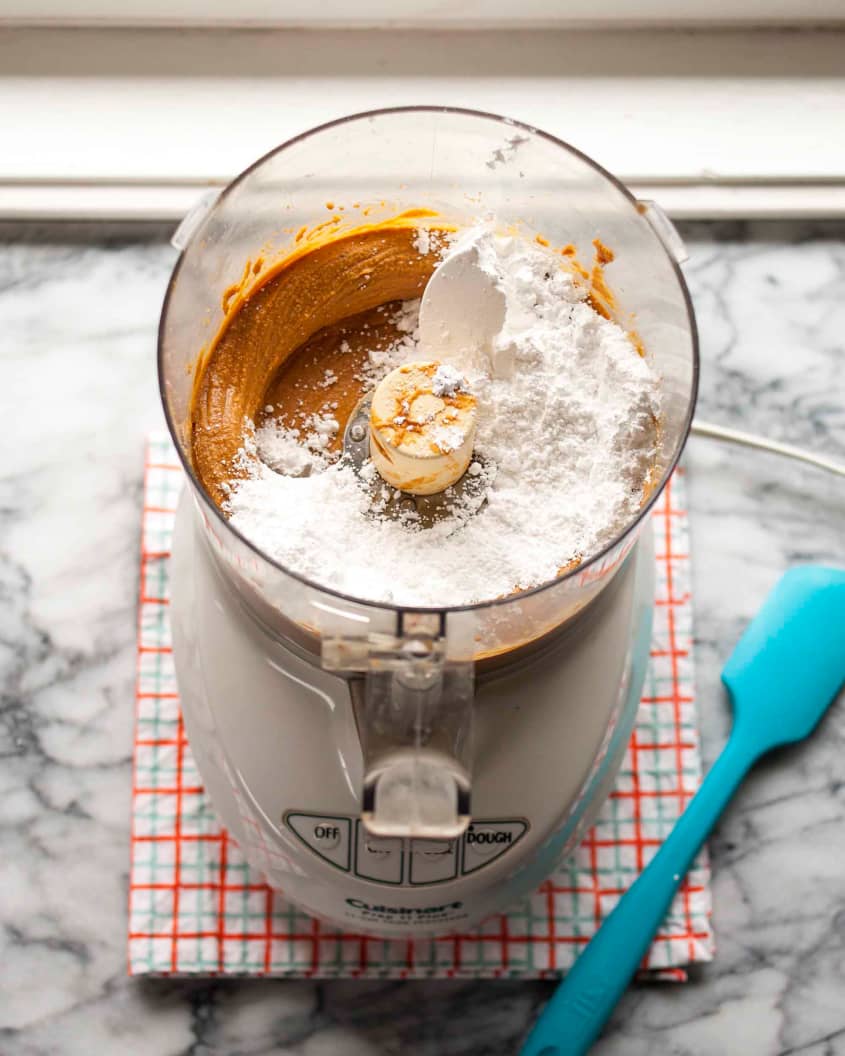
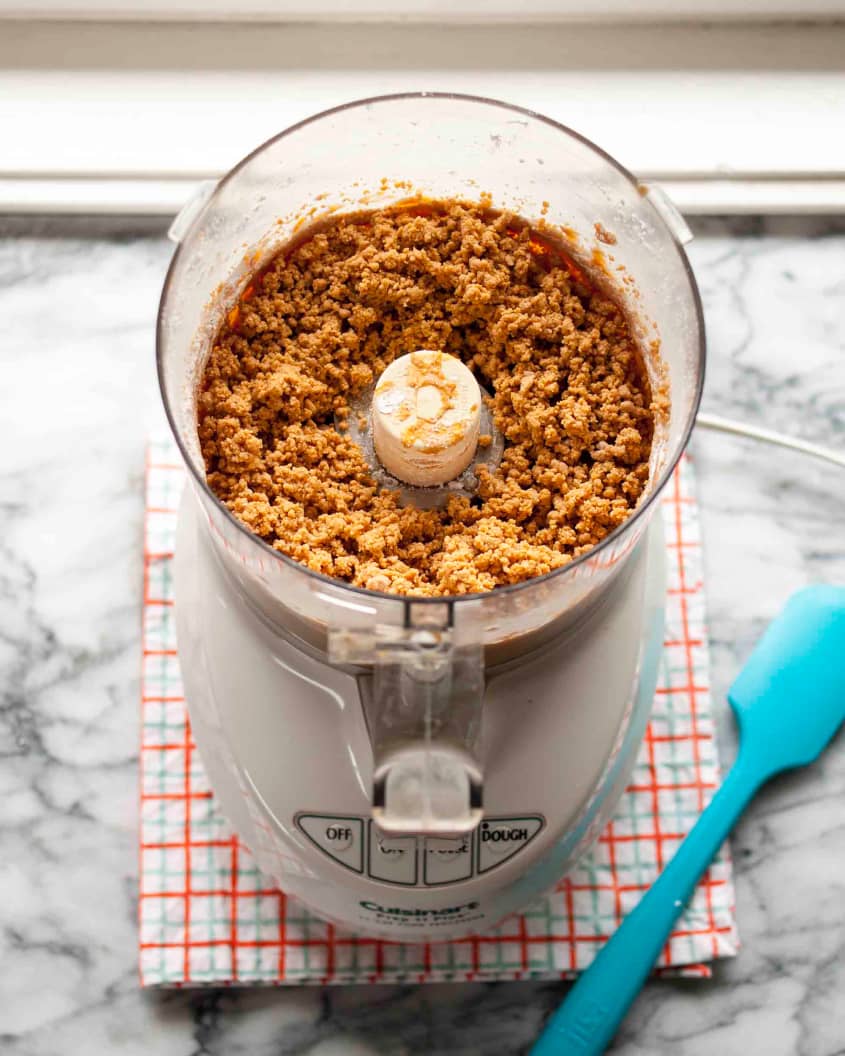
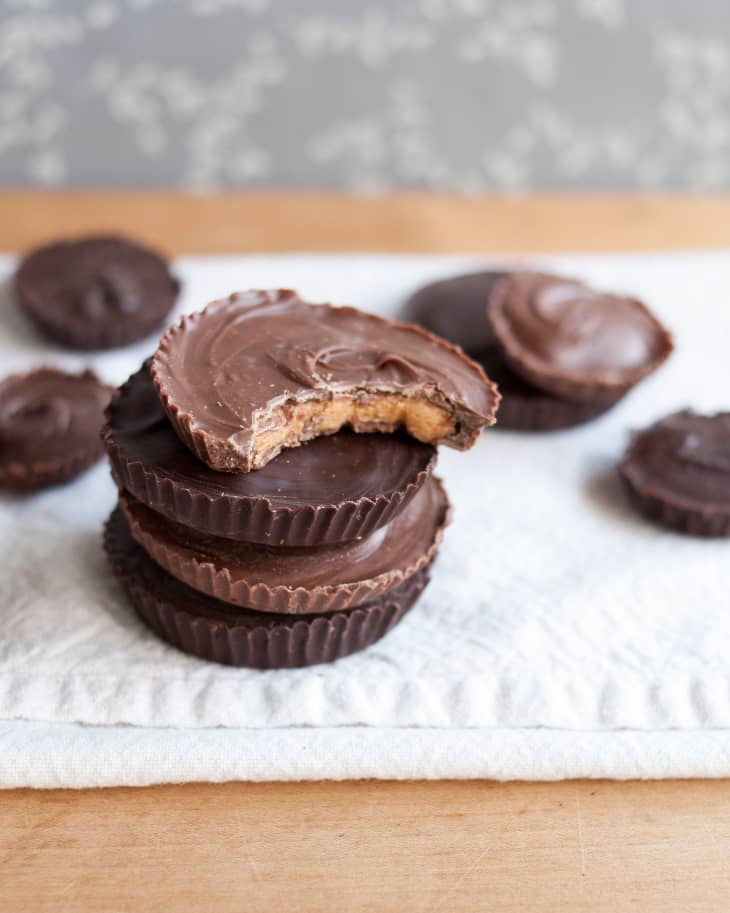
Make the peanut butter filling: Combine the peanut butter, powdered sugar, and any optional extras in the bowl of a food processor. Pulse 15 to 20 times until the mixture is dry and crumbly. Taste and add more powdered sugar or spices to taste. Transfer the peanut butter filling to a clean bowl, cover, and keep chilled in the refrigerator until ready to use.
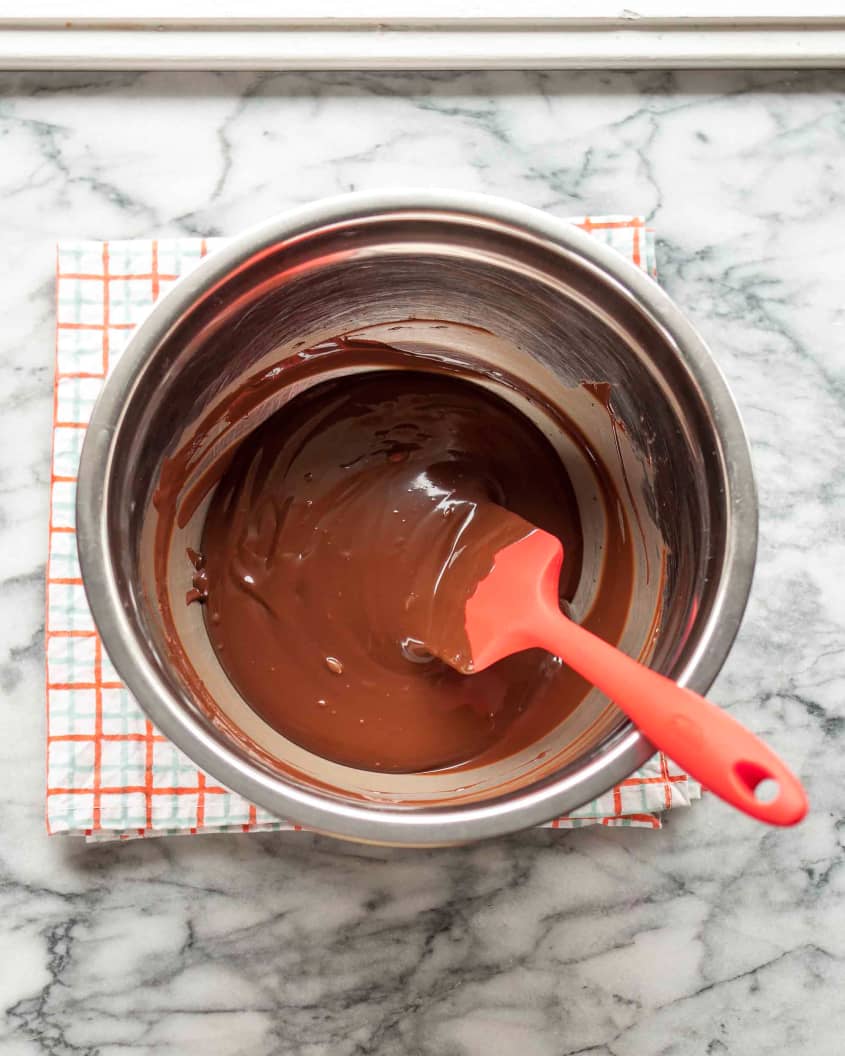
Melt 1/3 of the chocolate: Place 1/3 of the chocolate into a heat-proof bowl. Fill the saucepan with a few inches of water and bring to a simmer. Remove from heat and set the bowl of chocolate over the water. Let the chocolate stand without stirring until nearly melted, then stir until smooth. Remove the heatproof bowl from the saucepan and place it on a towel near your work surface.
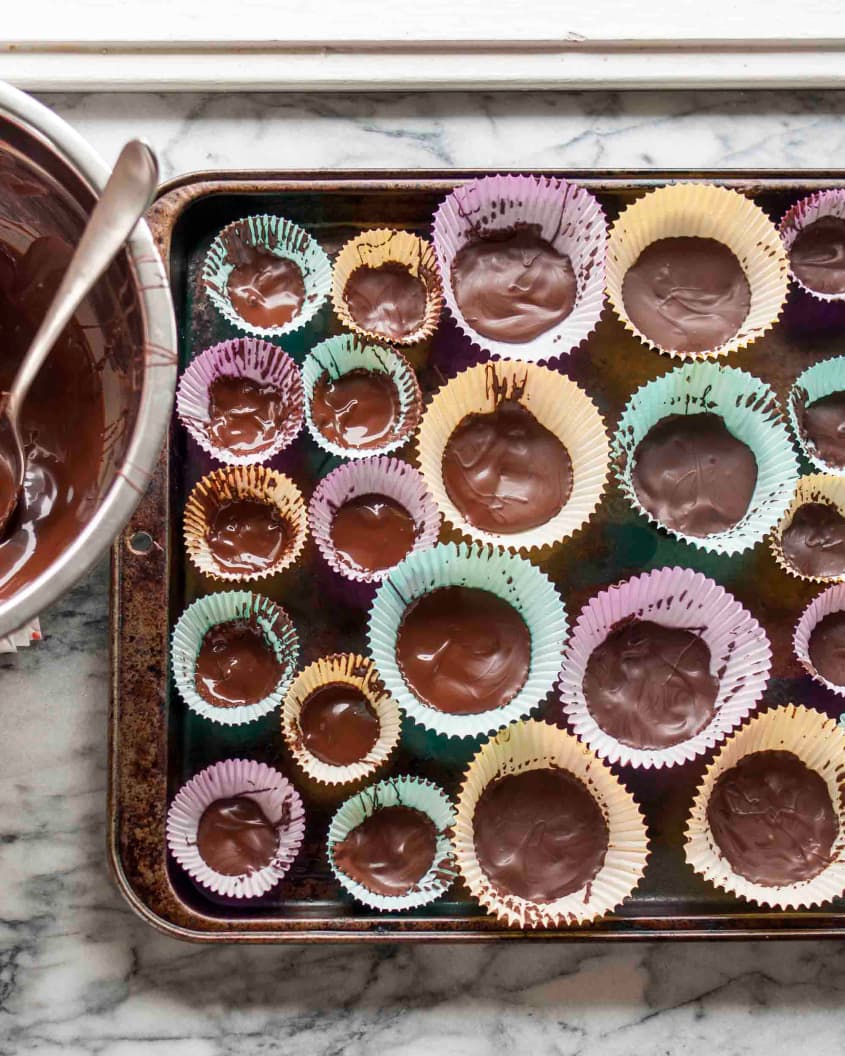
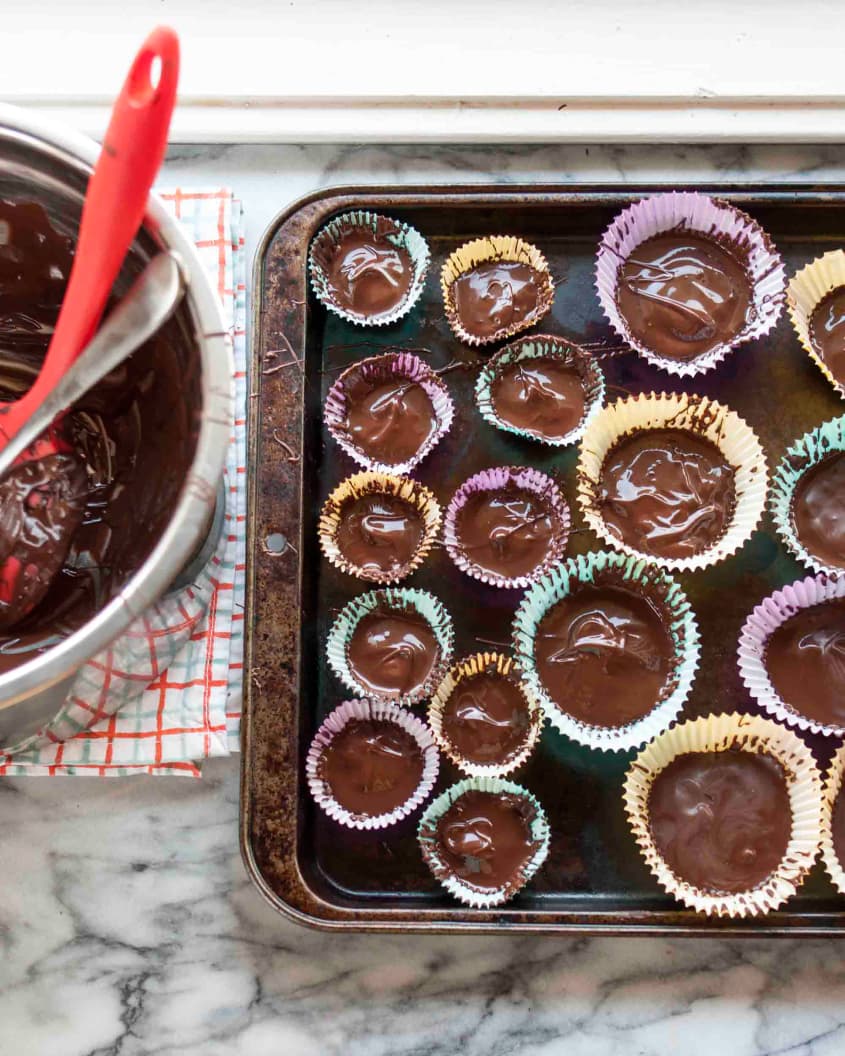
Prepare the cup liners: While the chocolate is melting, arrange the muffin cup liners on a baking sheet.
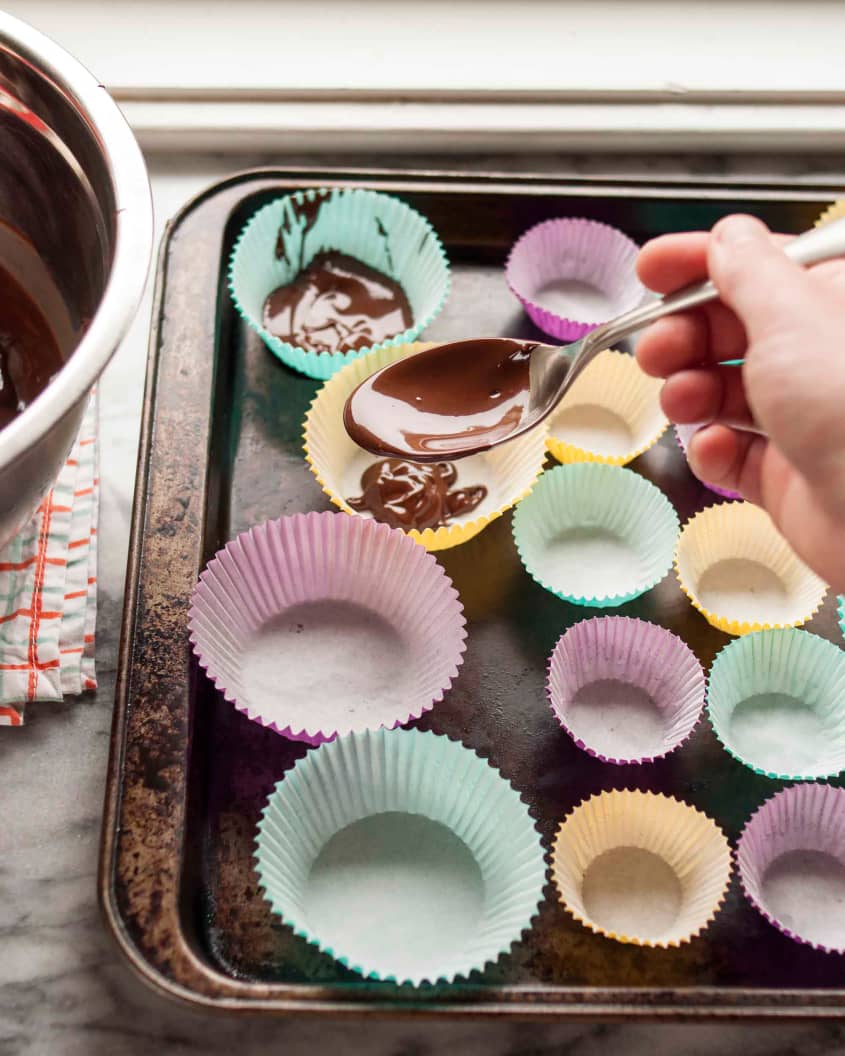
Fill the cup liners with a layer of chocolate: Use a spoon to scoop up a small amount of chocolate and drizzle it into the cup liners. Use the back of the spoon to gently smooth the chocolate into a thin layer (roughly 1/8-inch thick, but no need to get exact about it!) on the bottom of the cup. Repeat with all the remaining liners.
Let the bottom chocolate layer set: If your house is chilly, the first cups will already be setting by the time you finish the last ones. To speed things along, you can place the baking sheet of cups in the fridge for a few minutes. Wait until the chocolate is firm before continuing with the next steps.
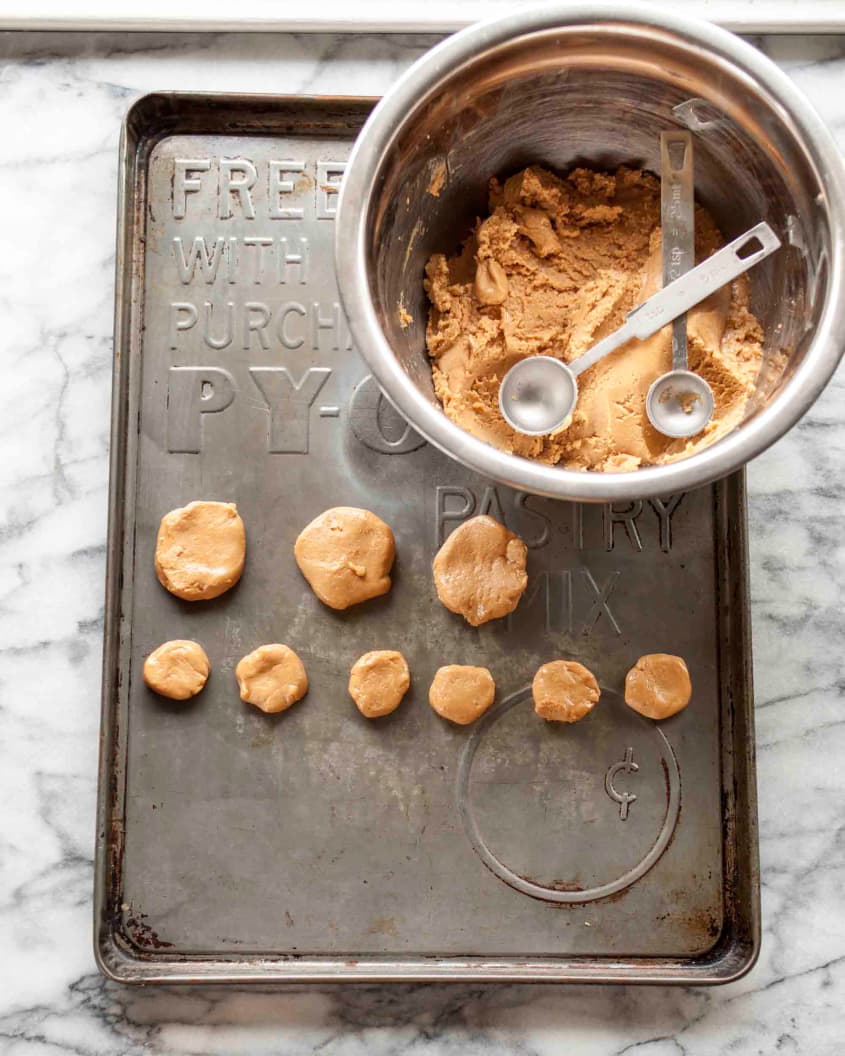
Prepare the peanut butter filling: While the chocolate is setting, begin preparing the filling. For large peanut butter cups, scoop slightly mounded teaspoons of filling and shape them into thick disks with your fingers. For smaller peanut butter cups, use a scant 1/2 teaspoon to scoop the dough. The disks should be nearly the diameter of the cup with just a little space left around the edge.
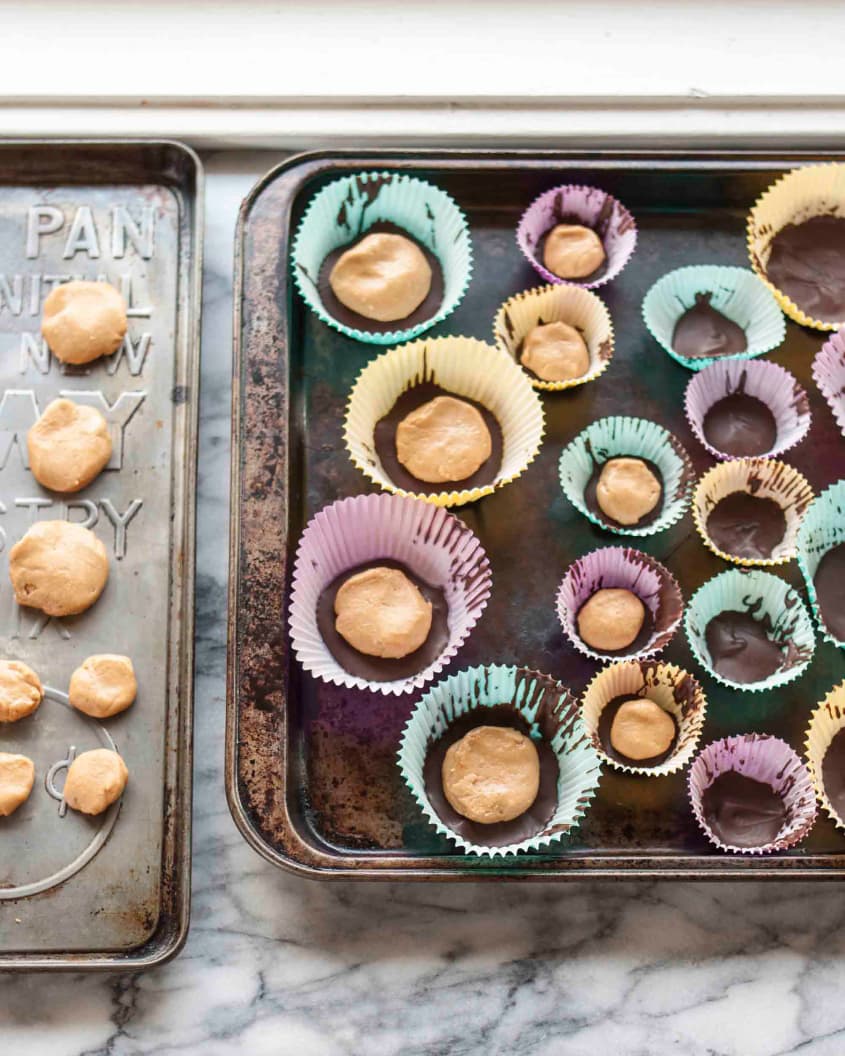
Place the peanut butter filling in the cups: Once the chocolate has set, transfer the disks of peanut butter to the cups.
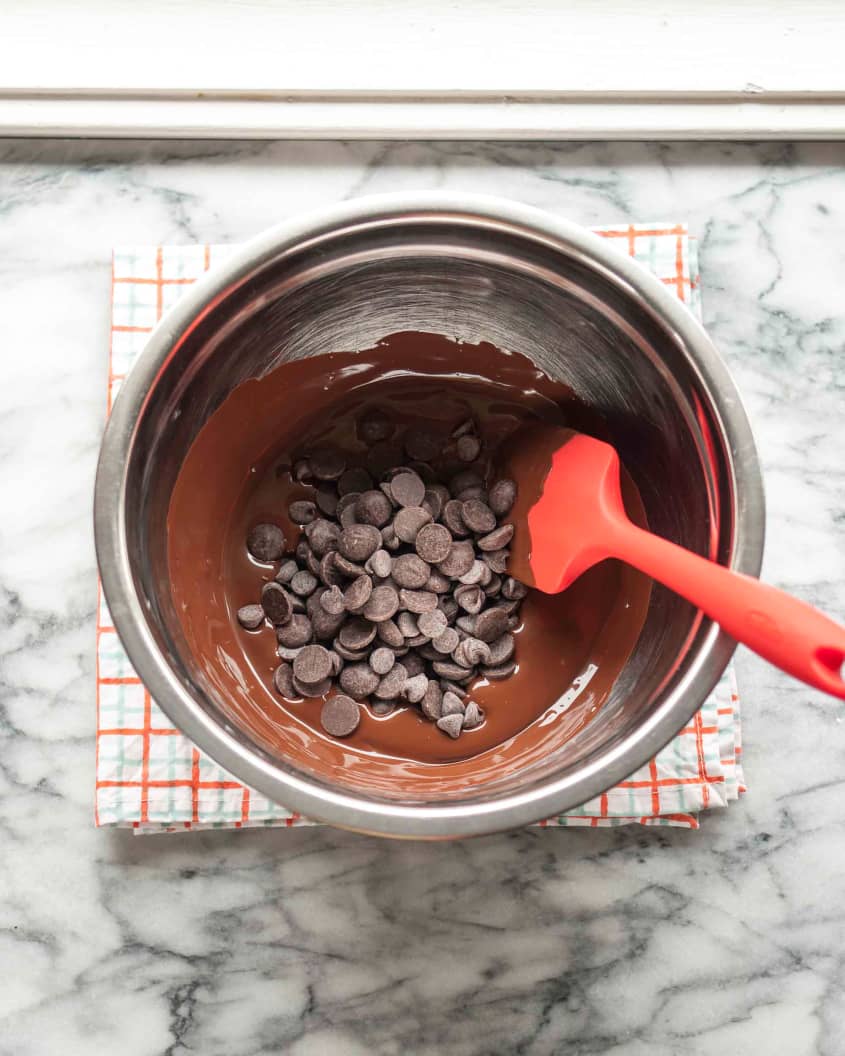
Melt the remaining chocolate: Scoop 1/4 cup of the remaining chocolate and set it aside. Transfer the rest of the chocolate into the heatproof bowl (if there is any chocolate remaining from lining the cups, it's fine to leave it in the bowl). Bring the water in the saucepan back to a simmer. Remove the pan from heat and place the bowl of chocolate over the water. Let the chocolate stand without stirring until nearly melted, then stir until smooth.
Temper the chocolate: Remove the heatproof bowl from the saucepan and place it on a towel near your work surface. Add the reserved 1/4 cup of chocolate to the bowl and stir until smooth. Your chocolate is now effectively tempered. If it becomes too thick to pour as you are making the candies, place it over the saucepan of warm water for a few seconds, stir, and continue. (For more detailed tempering instructions, see How to Temper Chocolate Without a Thermometer)
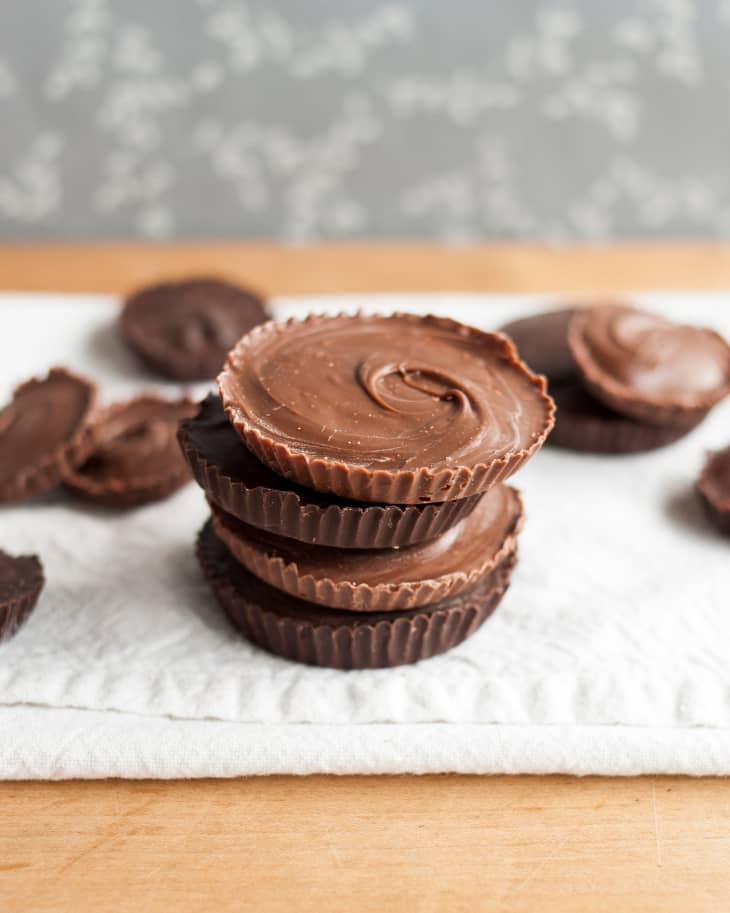
Finish the candies: Scoop a generous spoonful of chocolate and drizzle it over the peanut butter filling. Use the back of the spoon to gently spread the chocolate around the filling and smooth the top. Repeat with all the remaining candies.
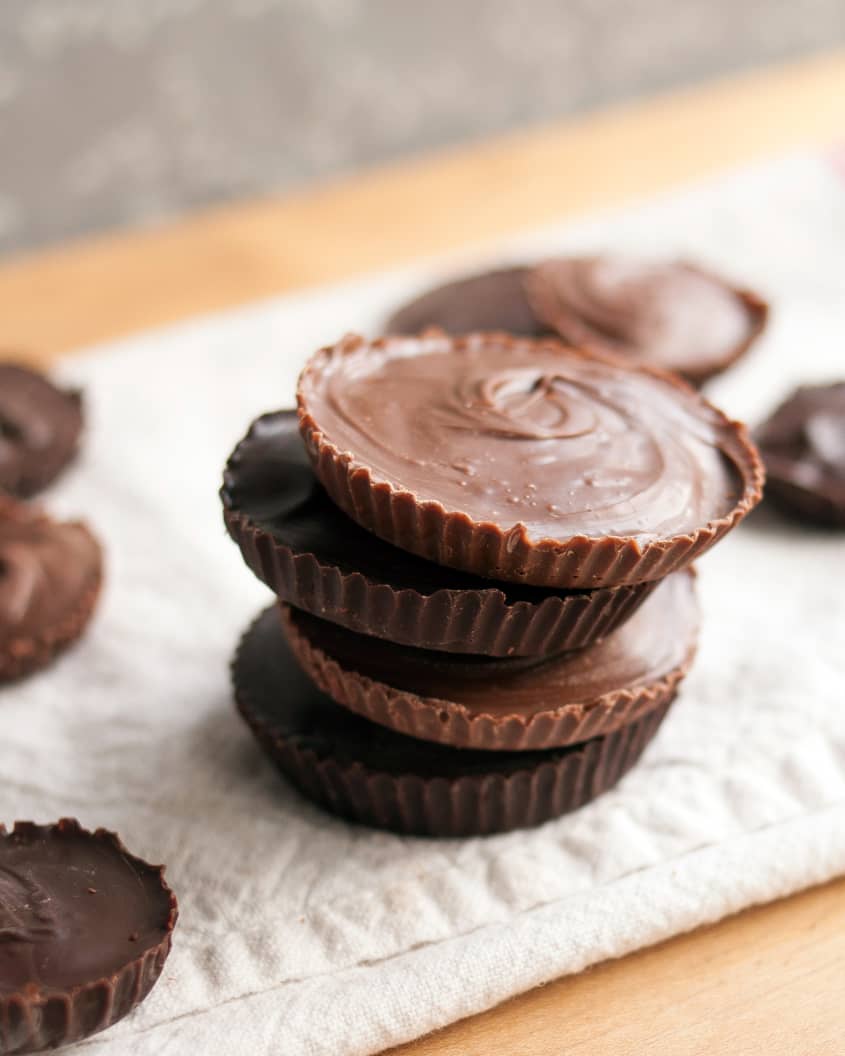
Let the peanut butter cups set: Set the tray of peanut butter cups somewhere cool until the chocolate has fully set and the tops are dry, then you can transfer the candies to a container for storage. Remove the paper wrappers before serving.
Want more smart tutorials for getting things done around the home?
See more How To posts
We’re looking for great examples of your own household intelligence too!
Submit your own tutorials or ideas here!