
How To Make the Easiest No-Bake Chocolate Cream Pie

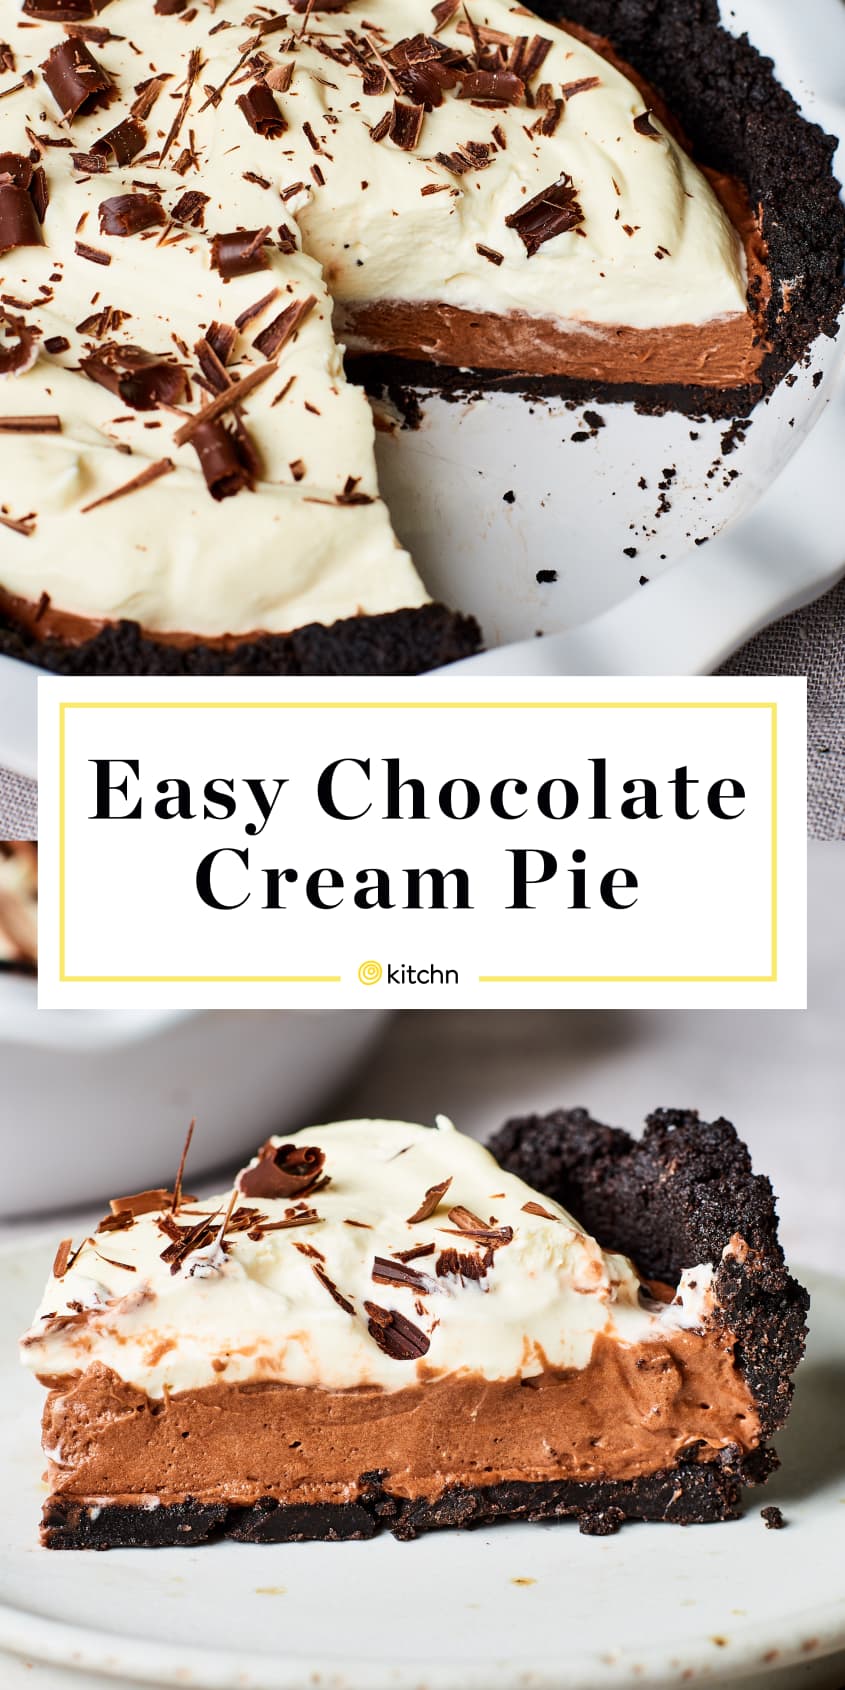
A silky-smooth chocolate cream pie made with an Oreo crust and topped with whipped cream and chocolate shavings.
Serves8 to 12
Makes1 (9-inch) deep-dish pie
Prep15 minutes

I’m not exaggerating when I say one of my best and strongest childhood memories is eating single-serve cups of chocolate cream pie from my elementary school’s cafeteria. My sister and I loved those things — to the point where I’ve since looked them up to try to order some to my apartment, but I think they must have been discontinued or are only sold directly to Midwestern cafeterias.
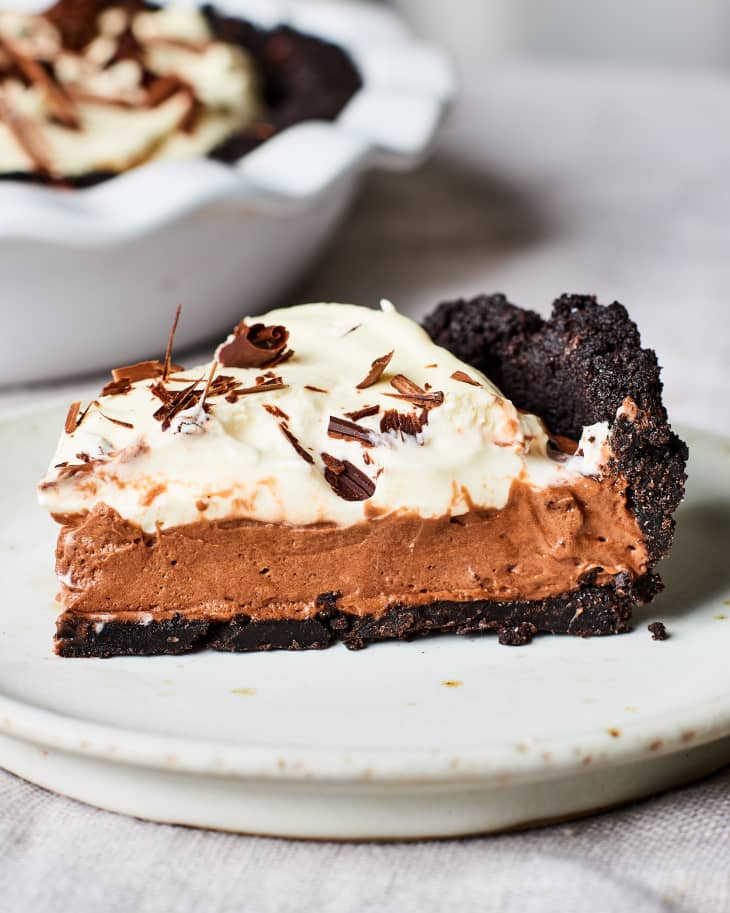
The cups were so memorable because of their four distinct layers: buttery crushed graham crackers on the bottom, a thick layer of creamy chocolate pudding, a dollop of light-as-air whipped cream, and a sprinkling of mini chocolate chips. I knew I had to re-create this deliciousness at home, but in a larger format so it could feed a crowd. Here’s how to make the easiest-ever chocolate cream pie at home, inspired by my favorite childhood dessert.

3 Smart Steps for the Easiest-Ever Chocolate Cream Pie
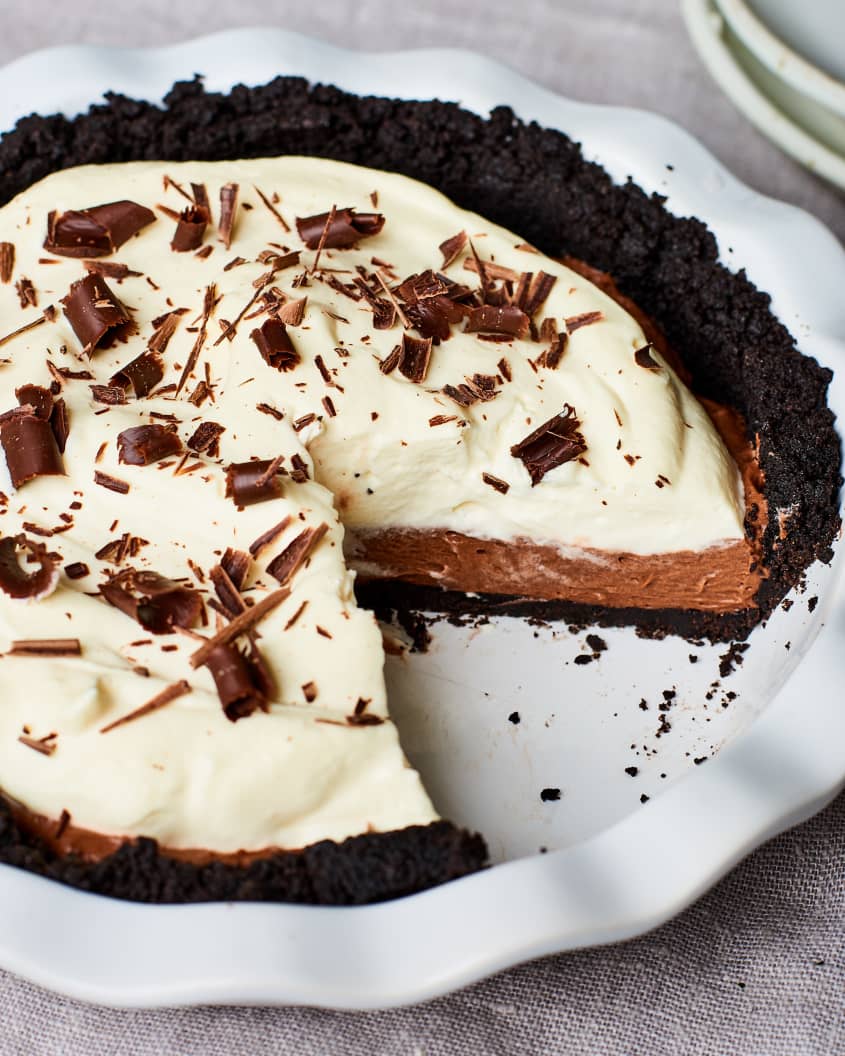
1. Opt for a no-bake Oreo crust. Although I grew up on a graham cracker crust, I wanted this pie to be entirely no-bake, and no-bake Oreo crusts are far superior. All you have to do is crush Oreos in the food processor, stream in melted butter, and add a pinch of salt. Then, dump the mixture into your pie plate and use a flat-bottomed measuring cup to push it all the way up the sides of the pan. Transfer to the refrigerator while you make the filling; it will firm up as it chills.
2. Make the filling with instant pudding mix. Making pudding from scratch is a fun snow-day project, but the 10-step process will significantly slow down your chocolate cream pie endeavor. Instead, buy a box of instant chocolate pudding mix (make sure it’s Instant, not Cook & Serve, or it won’t set up in the fridge), stir in some whole milk and whipped cream, and pour into your crust. There’s something about pudding mix that just tastes right here.
3. Use whipped cream two ways. You’ll whip a full pint of heavy cream — no need to measure, just pour the whole pint container into your mixer — until soft peaks form. Then, fold half of it (you can eyeball it) into your chocolate pudding mixture, which not only gives it a lighter, mousse-like texture, but it increases its volume so it fills out more of the crust and helps it firm up so that you can cut a clean slice. Then, you’ll save the rest of the whipped cream for spreading all over the top of the pie. Garnish with chocolate curls and voila! You’ve just made the easiest, tastiest (and for me, most nostalgic) chocolate cream pie.
Chocolate Cream Pie
A silky-smooth chocolate cream pie made with an Oreo crust and topped with whipped cream and chocolate shavings.
Prep time 15 minutes
Makes 1 (9-inch) deep-dish pie
Serves 8 to 12
Nutritional Info
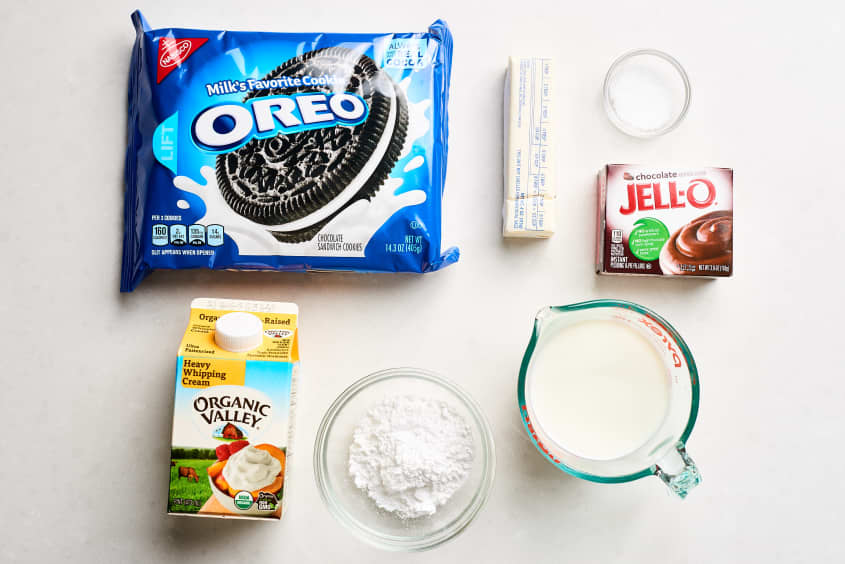
Ingredients
- 24
Oreo cookies (2 out of 3 rows of a 14.3-ounce package)
- 8 tablespoons
(1 stick) unsalted butter, melted (save the butter wrapper)
Kosher salt
- 2 cups
cold heavy cream
- 1/4 cup
powdered sugar
- 1 (3.9-ounce) box
Jell-O instant chocolate pudding mix
- 1 cup
whole milk
Chocolate curls or shavings, for garnish
Equipment
Deep dish pie plate
Stand mixer, hand mixer, or whisk
Large bowl
Y-shaped peeler (for chocolate curls)
Instructions
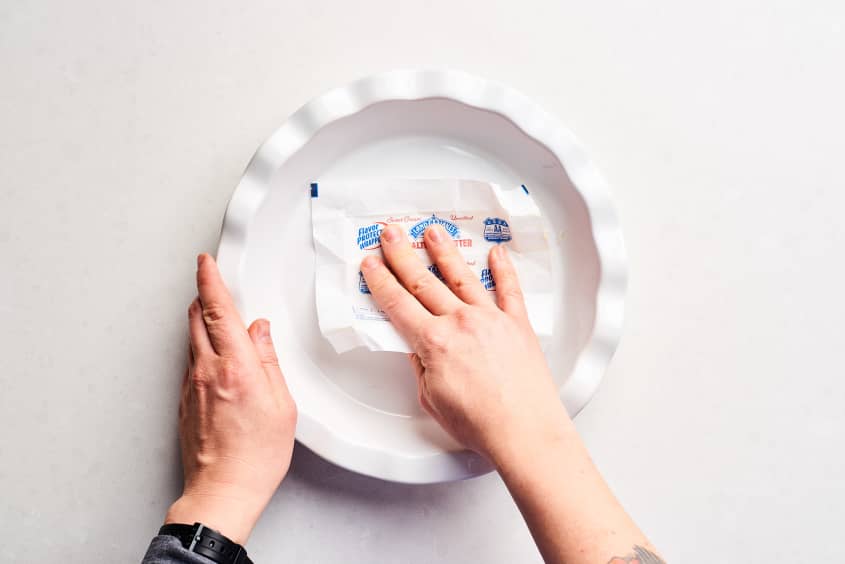
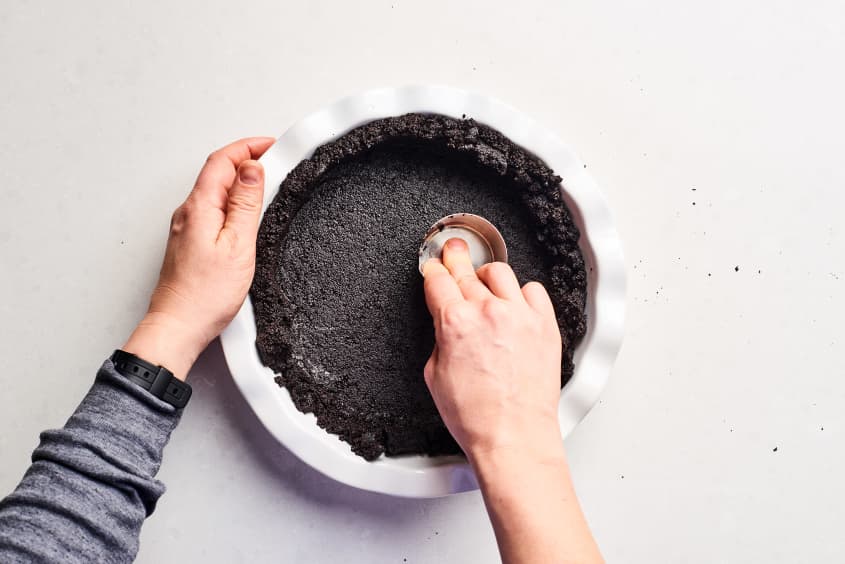
Grease the pie plate. Grease a 9-inch deep dish pie plate with the reserved butter wrapper; set aside.
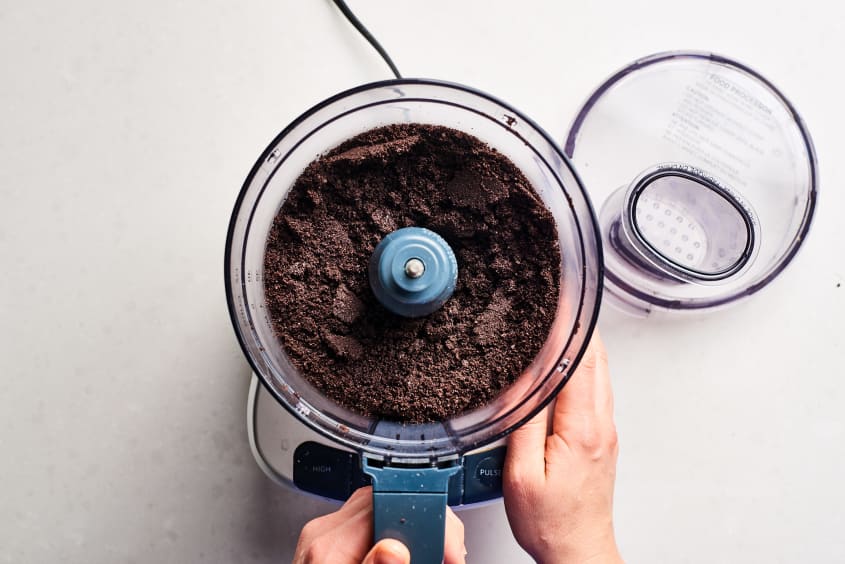
Process Oreos into crumbs. Place the Oreos in the bowl of a food processor fitted with the blade attachment and process until finely ground, about 30 seconds (you should have about 2 heaping cups Oreo crumbs).
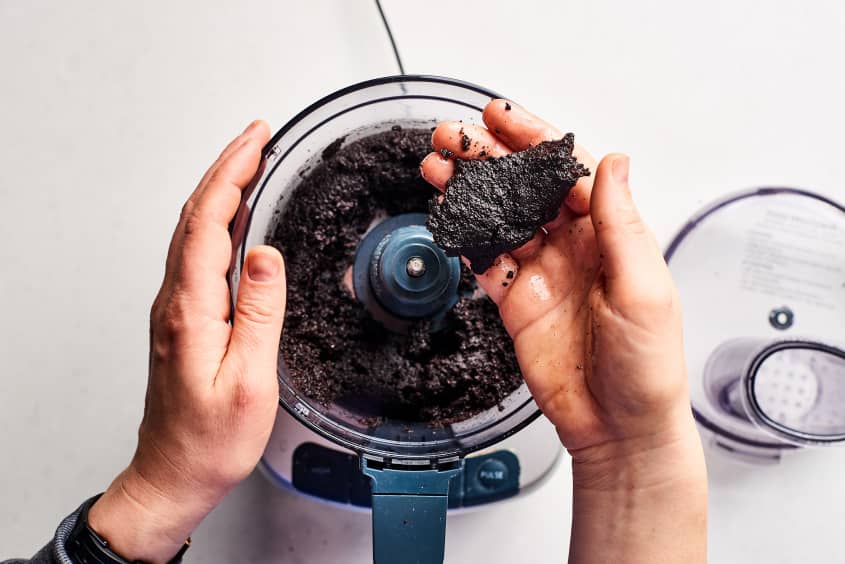
Add butter and salt. Add the butter and a pinch of salt and pulse to combine -- the mixture should hold together when pinched between your fingers.
Press the crust into the pie dish. Transfer the mixture to the prepared pie plate. Using a flat-bottomed measuring cup, press it into the bottom and all the way up the sides of the pan. Refrigerate while you make the filling.
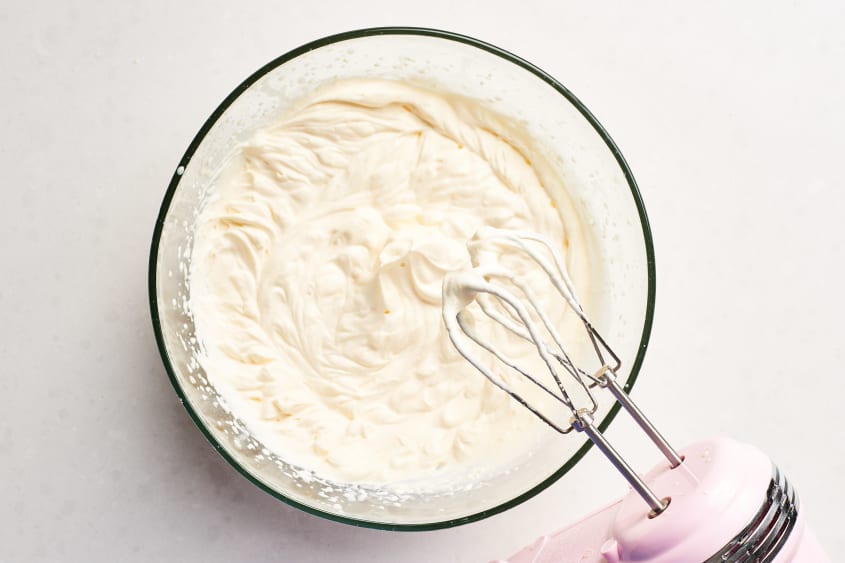
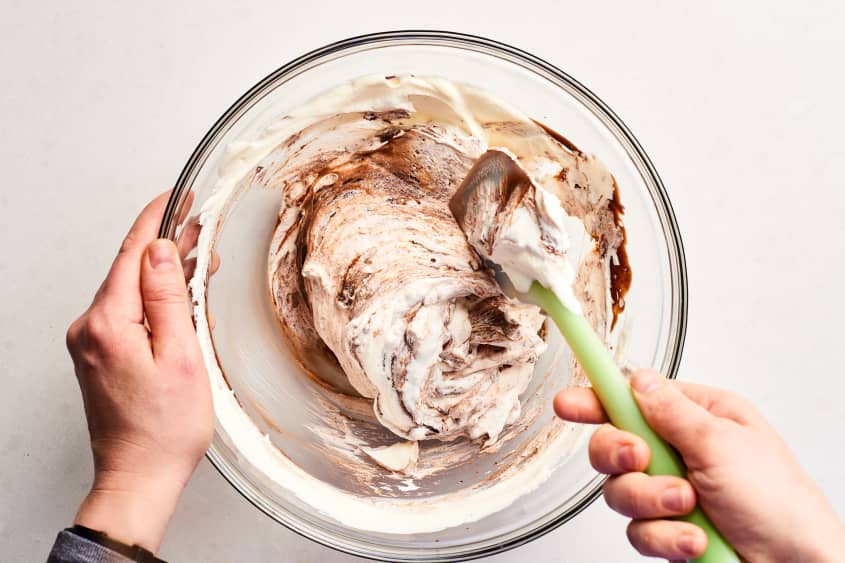
Make whipped cream. Place the cream and powdered sugar in the bowl of a stand mixer fitted with the whisk attachment. (Alternatiavely, use an electric hand mixer or a whisk and a large bowl) Beat on medium speed until soft peaks form; set aside.
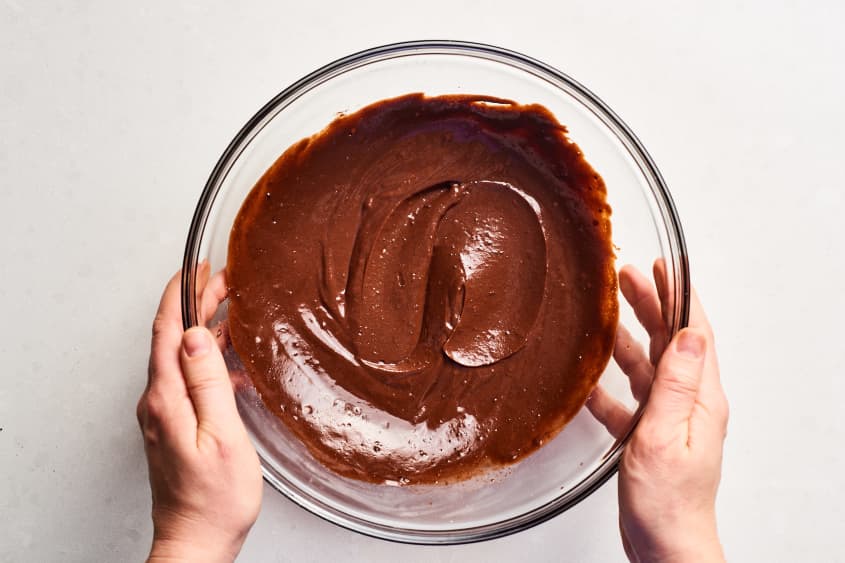
Make the pudding. Place the pudding mix and milk in a large bowl and whisk vigorously until very thick and no lumps remain, 1 to 2 minutes.
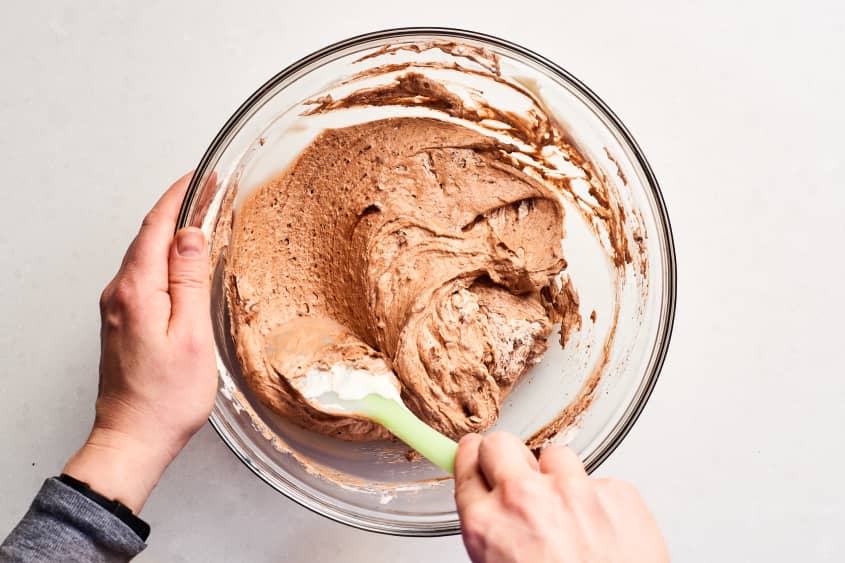
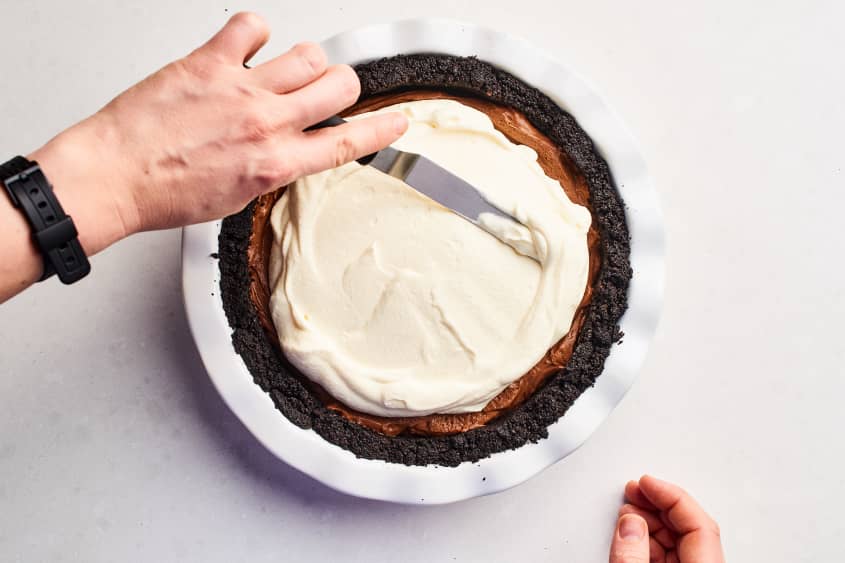
Fold in half of the whipped cream. Using a rubber spatula, fold half of the whipped cream (about 2 cups) into the pudding until well-combined and no streaks remain; refrigerate the remaining whipped cream.
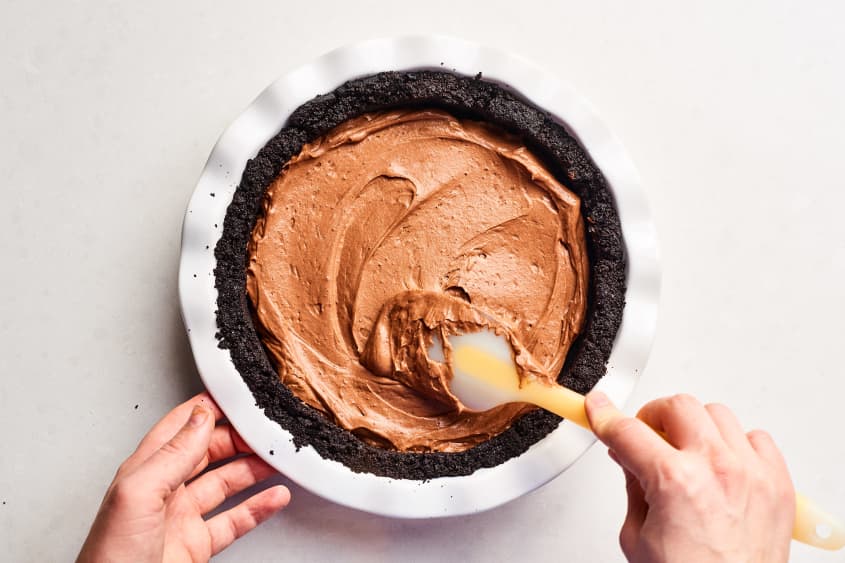
Pour into the crust. Pour the pudding mixture into the crust and use the rubber spatula to smooth the top. Press a piece of plastic wrap directly onto the pudding. Refrigerate until the pudding is set and very firm, at least 4 hours and up to 24.
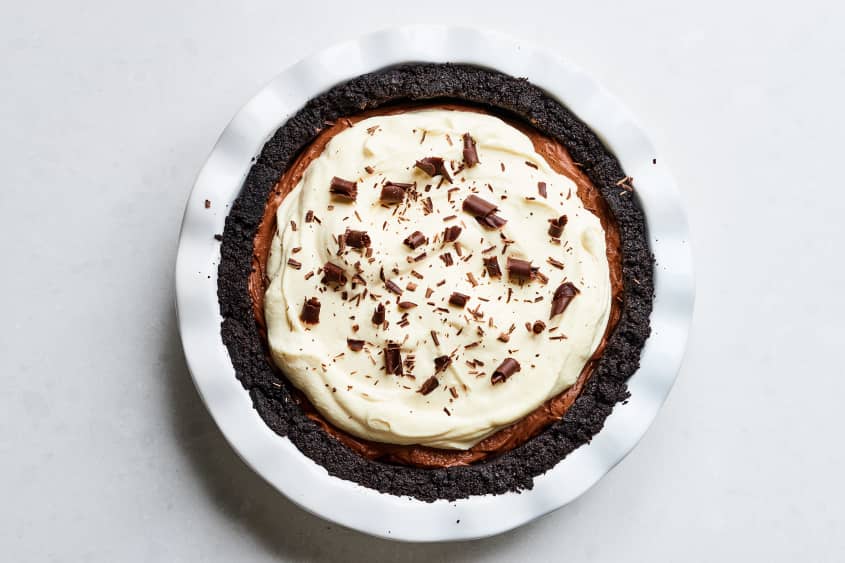
Top with whipped cream and chocolate curls. Just before serving, top the pie with the reserved whipped cream, spreading it all the way to the edges (you may need to re-whip the cream for about 30 seconds if it has lost its peaks). Garnish with chocolate curls or shavings. For clean slices, wipe the knife in between each slice.
Recipe Notes
Make ahead: The crust can be filled up to 1 day in advance. Refrigerate the extra whipped cream separately. Top with the whipped cream and chocolate curls just before serving.
Storage: Store leftovers, loosely wrapped in plastic wrap, in the refrigerator overnight.